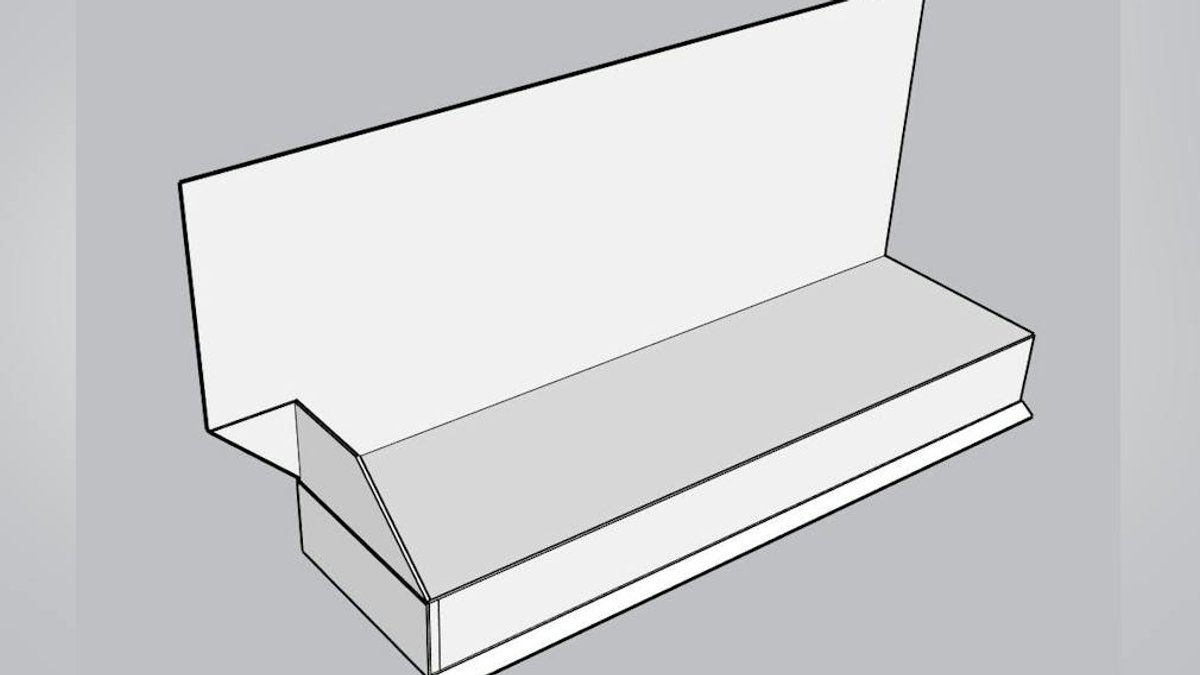
International Flashing Awareness Day (IFAD) is a day to highlight the importance of proper flashing techniques in construction. One critical area is head flashing, which protects windows from water damage. While the middle of the flashing is typically secure, leaks often occur at the edges and overlaps.
The Problem with Traditional Head Flashing
Standard head flashing that ends at the window casing edge leaves a vulnerable spot. Water can wrap under the flashing due to surface tension, leading to moisture behind the siding.
To address this, two methods are commonly used: folding the ends down or creating an end dam.
Fold-Down Method: A Simple Solution
The fold-down technique involves extending the flashing ½ inch beyond the window casing. After snipping ¼ inch at the bends, the vertical leg is folded back along the side, and the horizontal leg is folded down over it. This method is quick and straightforward, providing basic protection against water intrusion.
Read Also: Remodeling market sentiment remains steady
End Dam Method: Enhanced Performance
For better performance, an end dam can be created at each end of the flashing. This ensures that water is directed out at the face, preventing it from flowing down the window casing. Aron Jones, a remodeler from Big Dog Construction, demonstrated this technique in a video for IFAD.
Aron marks the flashing with lines at 3-1/2 inches, 2-1/2 inches, and 1-1/2 inches from the end, using a template to maintain a consistent angle. He prefers a 22-degree angle, matching the drip edge at the bottom. After marking, he cuts away the designated pieces, creating a sealed corner without the need for sealant.
The process involves bending and crimping the tabs with seamers or pliers, resulting in a clean finish. Aron emphasizes the importance of a neat appearance, as this is finish work that will be visible.
For the first bend, he folds one tab up, causing the vertical leg to fold back on itself, creating a sealed corner that requires no sealant. He uses hand seamers or bending pliers to tighten the folds, which also flattens the tab back into its original plane and gives the flashing a much cleaner look. “This is going to be seen,” says Aron, reminding us that it is finish work. The second bend is back down at the top of the angle cut, allowing the previously bent tab to be trimmed. Bending the exposed edges helps prevent nasty cuts, and it is worth it.
